As an artist, you have a unique opportunity to reach a wider audience and showcase your work through a Facebook page. Having a Facebook page allows you to engage with fans and followers, share your latest creations, and even sell your work directly to your audience.
This guide provides an easy-to-follow roadmap on how to create an Artist page on Facebook. By following these steps, you’ll be able to create a professional and engaging online presence that reflects your artistic identity and connects you with fans and potential customers.
Step 1: Creating a Facebook Account
Sign Up for a Facebook Account
If you don’t already have a personal Facebook account, you’ll need to create one. Go to Facebook’s homepage and follow the prompts to sign up. Make sure to choose the right type of account that suits your professional needs as an artist.
Privacy Settings
Once you’ve signed up, take a moment to review and adjust your privacy settings. Since this account will be linked to your professional artist page, you may want to set certain information to private or visible only to friends. This ensures that your personal life remains separate from your professional online presence.
Step 2: Setting Up the Artist Page
Choosing the Page Category
Now that you have a personal Facebook account, it’s time to create your artist page. Start by clicking on the “Create” button at the top of your Facebook homepage, then select “Page.” You’ll be prompted to choose a category for your page. Select “Artist” or a related category that best describes your work. This helps people find your page when they search for artists in your field.
Naming the Page
Choosing the right name for your page is crucial. Use your artist name or the name under which you conduct your business. If you have a well-known pseudonym or stage name, consider using that. Keep it simple and memorable so that fans can easily find you.
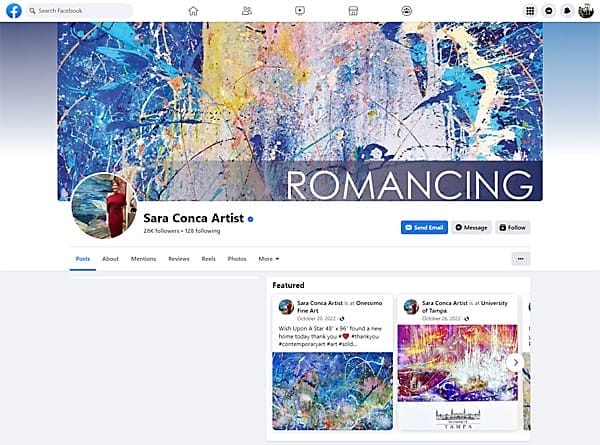
Adding Profile and Cover Photos
Your profile and cover photos are the visual representations of your brand. Make sure to choose high-quality images that reflect your artistic style. The profile picture could be a professional headshot or a logo, while the cover photo might showcase a piece of your work or an image from a recent exhibition or performance.
Writing a Compelling ‘About’ Section
The ‘About’ section is where you tell people who you are and what you do. Include a brief biography, your artistic influences, the mediums you work in, and any other information that helps define you as an artist. This is your chance to connect with visitors and give them a reason to follow your page.
You’ve now laid the foundation for your artist page on Facebook. You’ve chosen the right category, named your page, added visually appealing images, and crafted an ‘About’ section that tells your story.
Step 3: Customizing the Page
Adding Contact Information
Your fans and potential clients need a way to reach you. Under the “About” section of your page, there’s an option to add contact information. Make sure to include your professional email, website, and phone number if you’re comfortable sharing it. This makes it easier for people to inquire about your work, collaborations, or bookings.
Creating Custom Tabs and Sections
Facebook allows you to add custom tabs and sections to better organize your content. Consider adding a “Portfolio” tab to showcase your best works, an “Events” section if you have upcoming exhibitions or performances, and a “Shop” tab if you sell your art directly. Tailor these tabs to suit your artistic niche and what you offer.
Setting Up a Call-to-Action Button
A call-to-action (CTA) button is a prominent feature on your page that directs visitors to take a specific action. Depending on your goals, this could be a “Book Now” button for appointments, a “Contact” button to send you a message, or a “Shop Now” button leading to your online store. Think about what action you’d most like visitors to take and set up your CTA accordingly.
Step 4: Content Strategy
Creating and Scheduling Posts
Consistency is key when it comes to engaging your audience. Plan out your content in advance, considering a mix of posts showcasing your work, behind-the-scenes glimpses, and personal reflections. Tools within Facebook allow you to schedule posts, ensuring you maintain a regular posting schedule even on busy days.
Engaging with Followers
Your followers will likely comment on your posts, send messages, or share your content. Engage with them by responding to comments, thanking them for shares, and answering messages promptly. This not only builds a sense of community but also boosts your page’s visibility.
Using Facebook Stories and Live Videos
Facebook Stories and Live Videos are powerful tools to connect with your audience in real-time. Consider going live during a studio session, hosting a Q&A, or sharing snippets of your day through Stories. This adds a personal touch and allows followers to see the person behind the art.
Remember, every artist’s journey is unique. While the digital landscape might seem overwhelming at first, with consistency and authenticity, you’ll find your voice and audience. Embrace the platform, engage genuinely, and let your passion shine through.


